iphone开发我的新浪微博客户端-用户登录等待篇(1.4)
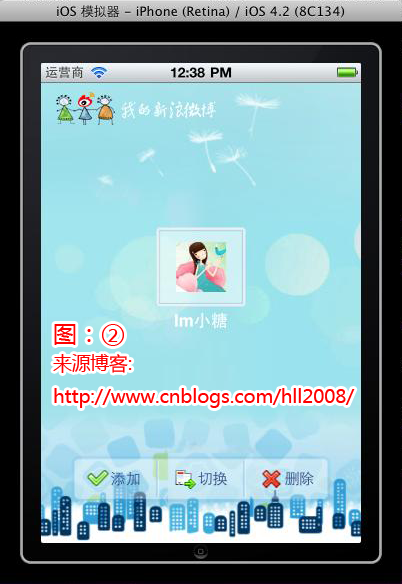
本篇在上一篇的基础上完成如上(图2)所示的用户登录等待功能,首先说说这个页面功能的由来,这个就是当检查sqlite库中已经存在用户账号的时候从表中把用户记录查询出来,然后从NSUserDefaults中获取上一次登录的账号,如果查询出来的用户记录中包含上一次登录的账号,那么就把这个账号作为默认显示账号,如果没有就取用户记录中的第一个账号作为默认显示账号,上一篇中当用户完成OAuth认证把账号信息保存到sqlite库后也是显示这个页面功能。
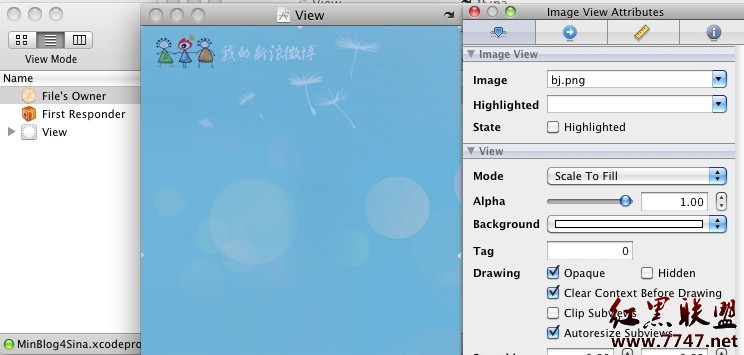
先来看看UI是怎么实现了,看上图这个界面包含用户头像小图标、用户名称、3个功能按钮(添加、切换、删除)这三部分元素,我的做法是把这三部分元素添加到一个单独的UIView上,并且把这个UIView背景设置成透明,然后把这个UIView显示在上一篇的LoginViewController的View之上,这样UIView就有了背景图了,背景图由底下的LoginViewController的View提供。同时上一篇中在做LoginViewController有个遗漏忘记讲给LoginViewController的View添加背景图了,这里补上,做法是如下:
补上一篇:双击LoginViewController.xib文件,开启IB后双击LoginViewController.xib的View打开,然后从Library面板中拖一个Image View组件到这个View上并且把这个Image View尺寸设置跟View一样大,然后为这个Image View设置一张背景图,如下图:
补上上面的内容后,现在回到正题继续讲本篇的功能。
一、上面讲到了新建一个单独的UIView作为本功能的界面,这里先新建名为SelectViewController的UIViewController subclass类型的类文件,新建的时候记得勾上With XIB user interface选项。
二、打开上步新建的SelectViewController.h文件,声明一个UIButton作为用户头像小图标,一个UILabel作为用户名称,还有delegate和onClick用来调用LoginViewController中的方法用,还有这还import了一个名为UICustomSegmentedControl.h的文件,这个是一个自定义的组件,用来实现上面提到的3个按钮的功能,该组件和系统自带的UISegmentedControl组件类似,至于为什么非要自己做一个而不用系统自带理由和前面的UIDialogWindow一样,文章最后我会把这个组件的代码贴出来这里就不解释了直接使用这个组件,具体代码如下:
#import <UIKit/UIKit.h>
#import "Global.h"
#import "UICustomSegmentedControl.h"
@interface SelectViewController : UIViewController<UICustomSegmentedControlDelegate> {
IBOutlet UIButton *iconBtn;
IBOutlet UILabel *nameLabel;
id delegate;
SEL onClick;
}
@property(nonatomic,retain)IBOutlet UIButton *iconBtn;
@property(nonatomic,retain)IBOutlet UILabel *nameLabel;
@property(nonatomic,retain)id delegate;
-(id)initWithDelegate:(id)aDelegate onClick:(SEL)aOnClick;@end
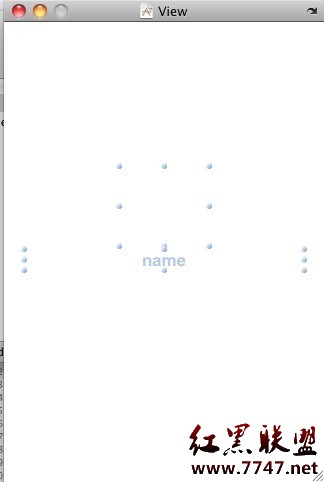
三、双击SelectViewController.xib用IB打开,Library面板中拖一个UIButton和UILabel到View中间合适的位置同时做好连接操作,分别连接到SelectViewController.h中的iconBtn和nameLabel,并且把View的background设置成clear color然后保存,如下图:
四、打开SelectViewController.m文件,首先是initWithDelegate方法,这个方法主要是设置SelectViewController的delegate和delegate,代码如下:
-(id)initWithDelegate:(id)aDelegate onClick:(SEL)aOnClick;{ if (self=[super init]) { self.delegate=aDelegate; onClick=aOnClick; } return self;} 五、接下来我们要设置一下用户头像小图标(iconBtn)白色方框背景和默认用户小图标,实现代码非常简单了,在viewDidLoad方法里添加如下代码:
[iconBtn setBackgroundImage:[[Global pngWithPath:@"icon_bg"]stretchableImageWithLeftCapWidth:8.0 topCapHeight:7.0] forState:UIControlStateNormal]; [iconBtn setBackgroundImage:[[Global pngWithPath:@"icon_h_bg"] stretchableImageWithLeftCapWidth:8.0 topCapHeight:7.0] forState:UIControlStateHighlighted]; [iconBtn setImage:[Global pngWithPath:@"user_icon"] forState:UIControlStateNormal]; [iconBtn setImage:[Global pngWithPath:@"user_icon"] forState:UIControlStateHighlighted]; 六、接下来我们要实现3个功能按钮(添加、切换、删除),前面提到了这功能是由自定义组件UICustomSegmentedControl实现的,在viewDidLoad方法里实例化一个UICustomSegmentedControl并且添加到SelectViewController的View中间适当位置,UICustomSegmentedControl实例化的时候需要5个参数,分别子按钮个数、子按钮尺寸、子按钮之间分隔图片、tag属性、delegate属性,代码如下:
UICustomSegmentedControl *segmented=[[UICustomSegmentedControl alloc] initWithSegmentCount:3 segmentsize:CGSizeMake(85.0f, 46.0f) dividerImage:[Global pngWithPath:@"line"] tag:99909 delegate:self]; segmented.center=CGPointMake(self.view.bounds.size.width/2,self.view.bounds.size.height-64); [self.view addSubview:segmented]; [segmented release]; 七、UICustomSegmentedControl组件使用还没有完,还需要实现几个方法,代码如下:
//构造子按钮-(UIButton*)buttonFor:(UICustomSegmentedControl*)segmentedControl atIndex:(NSUInteger)segmentIndex;{ UIButton* button = [UIButton buttonWithType:UIButtonTypeCustom]; button.frame = CGRectMake(0.0f, 0.0f, segmentedControl.segmentSize.width, segmentedControl.segmentSize.height); button.adjustsImageWhenHighlighted = NO; button.titleLabel.font=[UIFont systemFontOfSize:15.0f]; [button setTitleColor:[UIColor colorWithRed:50.0f/255.0f green:79.0f/255.0f blue:133.0f/255.0f alpha:1.0f] forState:UIControlStateNormal]; if (segmentIndex==0) { [button setBackgroundImage:[[Global pngWithPath:@"left_btn"]stretchableImageWithLeftCapWidth:10.0 topCapHeight:23.0] forState:UIControlStateNormal]; [button setBackgroundImage:[[Global pngWithPath:@"left_h_btn"] stretchableImageWithLeftCapWidth:10.0 topCapHeight:23.0] forState:UIControlStateHighlighted]; [button setImage:[Global pngWithPath:@"add"] forState:UIControlStateNormal]; //[button setImage:[Global pngWithPath:@"add"] forState:UIControlStateHighlighted]; [button setTitle:@"添加" forState:UIControlStateNormal]; }else if (segmentIndex==1) { [button setBackgroundImage:[[Global pngWithPath:@"center_btn"]stretchableImageWithLeftCapWidth:1.0 topCapHeight:23.0] forState:UIControlStateNormal]; [button setBackgroundImage:[[Global pngWithPath:@"center_h_btn"] stretchableImageWithLeftCapWidth:1.0 topCapHeight:23.0] forState:UIControlStateHighlighted]; [button setImage:[Global pngWithPath:@"change"] forState:UIControlStateNormal]; //[button setImage:[Global pngWithPath:@"change"] forState:UIControlStateHighlighted]; [button setTitle:@"切换" forState:UIControlStateNormal]; } else { [button setBackgroundImage:[[Global pngWithPath:@"right_btn"]stretchableImageWithLeftCapWidth:1.0 topCapHeight:23.0] forState:UIControlStateNormal]; [button setBackgroundIma
补充:移动开发 , IOS ,


