Android学习笔记(3)——基本控件三
RadioGroup与RadioButton 控件
首先需要在布局文件中设置RadioGroup的属性,然后在该RadioGroup中添加RadioButton的属性。这也可以认为,RadioGroup是RadioButton的一个容器,首先建立容器,然后在容器中添加物体。
代码片段如下:
<RadioGroup
android:id="@+id/gender"//设置id
android:layout_width="fill_parent"
android:layout_height="wrap_content"
android:orientation="vertical"//设置RadioGroup中RadioButton的排列方向
>
<RadioButton
android:id="@+id/male"//设置id
android:layout_width="fill_parent"
android:layout_height="wrap_content"
android:text="@string/male"
/>
<RadioButton
android:id="@+id/female"//设置id
android:layout_width="fill_parent"
android:layout_height="wrap_content"
android:text="@string/female"
/>
</RadioGroup>
布局文件写完之后,在所在Activity类中添加RadioGroup和RadioButton的对象。
因为是单选的,所以这个控件的事件需要设置在RadioGroup上,可以使用RadioGroup的setOnCheckedChangeListener的方法添加RadioGroup的OnCheckedChangeListener的监听器,需要Override其中的onCheckedChanged(RadioGroup group, int checkedId)方法,参数很明显,是所在group对象和所改变的RadioButton的id,在方法内部可以对RadioGroup以及RadioButton进行操作。
代码片段如下:
RadioGroup genderGroup = (RadioGroup)findViewById(R.id.gender);
RadioButton maleButton = (RadioButton)findViewById(R.id.male);
maleButton.setChecked(true);//默认选择男
RadioButton femaleButton = (RadioButton)findViewById(R.id.female);
genderGroup.setOnCheckedChangeListener(new RadioGroup.OnCheckedChangeListener() {
@Override
public void onCheckedChanged(RadioGroup group, int checkedId) {
// TODO Auto-generated method stub
if(femaleButton.getId()==checkedId){
Toast.makeText(ControlDemo2Activity.this, "Female", Toast.LENGTH_SHORT).show();
}
else{
Toast.makeText(ControlDemo2Activity.this, "Male", Toast.LENGTH_SHORT).show();
}
}
});
运行效果:

CheckBox控件
首先要在布局文件中定义CheckBox的样式id等信息,每一个CheckBox都需要定义。
代码片段如下:
<CheckBox
android:id="@+id/apple"
android:layout_width="fill_parent"
android:layout_height="wrap_content"
android:text="@string/apple"
/>
<CheckBox
android:id="@+id/orange"
android:layout_width="fill_parent"
android:layout_height="wrap_content"
android:text="@string/orange"
/>
<CheckBox
android:id="@+id/mango"
android:layout_width="fill_parent"
android:layout_height="wrap_content"
android:text="@string/mango"
/>
定义完CheckBox的之后,在Activity中创建CheckBox的对象,每个CheckBox上都可以设置监听器,可以使用CheckBox的setOnCheckedChangeListener的方法添加CompoundButton的OnCheckedChangeListener的监听器,需要Override其中的onCheckedChanged(CompoundButton arg0, boolean arg1),第一个参数是你所点击的CheckBox的对象,第二个参数是该对象是否被选中的boolean值,在方法中可以自己定义一些功能效果。
代码片段如下:
CheckBox appleCheck = (CheckBox)findViewById(R.id.apple);
appleCheck.setOnCheckedChangeListener(new CompoundButton.OnCheckedChangeListener() {
@Override
public void onCheckedChanged(CompoundButton arg0, boolean arg1) {
// TODO Auto-generated method stub
if(arg1==true)//当该Checkbox被按下
Toast.makeText(ControlDemo2Activity.this, "Apple Checked", Toast.LENGTH_SHORT).show();
else
Toast.makeText(ControlDemo2Activity.this, "Apple Unchecked", Toast.LENGTH_SHORT).show();
}
});
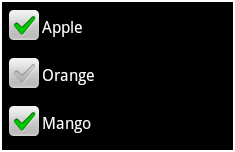
运行效果:
以上的两种控件的样式是可以在布局文件或者对象中可以设置。
附件为示例代码,仅供参考。嘎嘎~
本文出自 “战神殿” 博客
补充:移动开发 , Android ,