Android提高第七篇之XML解析与生成
本文使用SAX来解析XML,在Android里面可以使用SAX和DOM,DOM需要把整个XML文件读入内存再解析,比较消耗内存,而SAX基于事件驱动的处理方式,可以在各节点触发回调函数,不过SAX适合节点结构简单的XML文档,复杂的XML文档在后期的节点深度处理会有点麻烦。
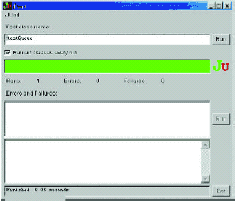
本文要解析的test.xml文件如下:
view plaincopy to clipboardprint?
<?xml version="1.0" encoding="utf-8"?>
<test>
<title>testSAX</title>
<content aa="1" bb="2">
<name>hellogv</name>
<url>http://blog.csdn.net/hellogv</url>
</content>
</test>
<?xml version="1.0" encoding="utf-8"?>
<test>
<title>testSAX</title>
<content aa="1" bb="2">
<name>hellogv</name>
<url>http://blog.csdn.net/hellogv</url>
</content>
</test>解析如上XML的结果如下:
使用SAX解析,需要定义SAXParserFactory(使应用程序能够配置和获取基于 SAX 的解析器以解析 XML 文档),SAXParser(从各种输入源解析 XML),XMLReader(使用回调函数读取 XML 文档),其中XMLReader是个关键。XMLReader可以为解析XML定义各种回调函数,“条件符合”的时候触发这些回调函数。
view plaincopy to clipboardprint?
SAXParserFactory factory = SAXParserFactory.newInstance();
SAXParser parser = factory.newSAXParser();
XMLReader reader = parser.getXMLReader();
reader.setContentHandler(handler);
reader.parse(new InputSource(testSAX.this.getResources()
.openRawResource(R.raw.test)));
SAXParserFactory factory = SAXParserFactory.newInstance();
SAXParser parser = factory.newSAXParser();
XMLReader reader = parser.getXMLReader();
reader.setContentHandler(handler);
reader.parse(new InputSource(testSAX.this.getResources()
.openRawResource(R.raw.test)));在这段代码里,XMLReader就调用继承DefaultHandler的SAXHandler。DefaultHandler已实现ContentHandler, DTDHandler, EntityResolver, ErrorHandler等接口,包含常见读取XML的操作,具体请看下面的SAXHandler.java源码。
生成XML的结果如下:
上图是读取各节点之后,使用XmlSerializer重新组合并输出XML字符串。
本文的main.xml代码如下:
view plaincopy to clipboardprint?
<?xml version="1.0" encoding="utf-8"?>
<LinearLayout xmlns:android="http://schemas.android.com/apk/res/android"
android:orientation="vertical" android:layout_width="fill_parent"
android:layout_height="fill_parent">
<Button android:layout_height="wrap_content"
android:layout_width="fill_parent" android:id="@+id/btnSAX"
android:text="使用SAX解析XML"></Button>
<Button android:layout_height="wrap_content"
android:layout_width="fill_parent" android:text="生成XML" android:id="@+id/btnOutput"></Button>
<EditText android:text="@+id/EditText01" android:id="@+id/EditText01"
android:layout_width="fill_parent" android:layout_height="fill_parent"></EditText>
</LinearLayout>
<?xml version="1.0" encoding="utf-8"?>
<LinearLayout xmlns:android="http://schemas.android.com/apk/res/android"
android:orientation="vertical" android:layout_width="fill_parent"
android:layout_height="fill_parent"><Button android:layout_height="wrap_content"
android:layout_width="fill_parent" android:id="@+id/btnSAX"
android:text="使用SAX解析XML"></Button>
<Button android:layout_height="wrap_content"
android:layout_width="fill_parent" android:text="生成XML" android:id="@+id/btnOutput"></Button>
<EditText android:text="@+id/EditText01" android:id="@+id/EditText01"
android:layout_width="fill_parent" android:layout_height="fill_parent"></EditText></LinearLayout>
SAXHandler.java的源码如下:
view plaincopy to clipboardprint?
package com.testSAX;
import java.util.ArrayList;
import org.xml.sax.Attributes;
import org.xml.sax.SAXException;
import org.xml.sax.helpers.DefaultHandler;
import android.util.Log;
public class SAXHandler extends DefaultHandler{
private ArrayList<String> keys = new ArrayList<String>();//保存字段名称
private ArrayList<Object> values = new ArrayList<Object>();//保存值
@Override
public void startDocument() throws SAXException {
super.startDocument();
}
@Override
public void endDocument() throws SAXException {
super.endDocument();
}
@Override
public void startElement(String uri, String localName, String qName,
Attributes attributes) throws SAXException {
//保存开始标记
keys.add("startTag");
values.add(localName);
Log.e("startTag",localName);
//保存属性值
for ( int i = 0; i < attributes.getLength(); i++ ){
keys.add("Attr");
String[] str=new String[2];
&nb


补充:移动开发 , Android ,