SpringSecurity初体验
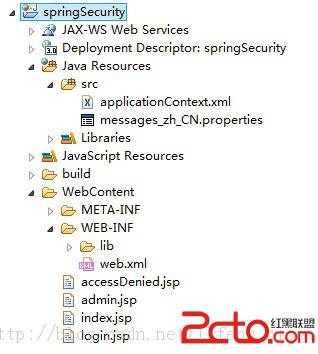
偶尔看到有这么个东西,恰好最近手头工作不太忙,想着细细看看,看有啥新发现,不看不知道,一看吓一跳,好东西啊,好吧,下面说说这个东西的强大:Spring Security是一个能够为基于Spring的企业应用系统提供描述性安全访问控制解决方案的安全框架。它提供了一组可以在Spring应用上下文中配置的Bean,充分利用了Spring IoC(依赖注入,也称控制反转)和AOP(面向切面编程)功能,为应用系统提供声明式的安全访问控制功能,减少了为企业系统安全控制编写大量重复代码的工作。说白了就是提供访问安全控制的东东,由于是spring应用,可以很好的支持SSH框架,使权限及安全控制随性所欲;下面通过简单例子说明下springsecurity的用法。1.新建项目springSecurity,2.将jar包放到项目lib目录下:3.在web.xml中配置springsecurity:源码如下:[html]<?xml version="1.0" encoding="UTF-8"?><web-app xmlns:xsi="http://www.w3.org/2001/XMLSchema-instance"xmlns="http://java.sun.com/xml/ns/javaee" xmlns:web="http://java.sun.com/xml/ns/javaee/web-app_2_5.xsd"xsi:schemaLocation="http://java.sun.com/xml/ns/javaee http://java.sun.com/xml/ns/javaee/web-app_3_0.xsd"version="3.0"><listener><listener-class>org.springframework.web.context.ContextLoaderListener</listener-class></listener><listener><listener-class>org.springframework.security.web.session.HttpSessionEventPublisher</listener-class></listener><context-param><param-name>contextConfigLocation</param-name><param-value>classpath:applicationContext*.xml</param-value></context-param><filter><filter-name>springSecurityFilterChain</filter-name><filter-class>org.springframework.web.filter.DelegatingFilterProxy</filter-class></filter><filter-mapping><filter-name>springSecurityFilterChain</filter-name><url-pattern>/*</url-pattern></filter-mapping><welcome-file-list><welcome-file>/index.jsp</welcome-file></welcome-file-list></web-app>4.在src下创建xml文件applicationContext.xml,源码如下:[html]<?xml version="1.0" encoding="UTF-8"?><beans xmlns="http://www.springframework.org/schema/beans"xmlns:xsi="http://www.w3.org/2001/XMLSchema-instance" xmlns:p="http://www.springframework.org/schema/p"xmlns:context="http://www.springframework.org/schema/context"xmlns:aop="http://www.springframework.org/schema/aop" xmlns:tx="http://www.springframework.org/schema/tx"xmlns:security="http://www.springframework.org/schema/security"xsi:schemaLocation="http://www.springframework.org/schema/beans http://www.springframework.org/schema/beans/spring-beans-3.1.xsd http://www.springframework.org/schema/tx http://www.springframework.org/schema/tx/spring-tx.xsdhttp://www.springframework.org/schema/aop http://www.springframework.org/schema/aop/spring-aop-3.0.xsdhttp://www.springframework.org/schema/context http://www.springframework.org/schema/context/spring-context-3.0.xsdhttp://www.springframework.org/schema/security http://www.springframework.org/schema/security/spring-security-3.2.xsd"><security:http auto-config="true"><!-- 指定登录页面 --><security:form-login login-page="/login.jsp" /><security:intercept-url pattern="/**" access="ROLE_ADMIN" /><security:intercept-url pattern="/admin.jsp*" access="ROLE_ADMIN" /><security:intercept-url pattern="/index.jsp*" access="ROLE_ADMIN,ROLE_USER" /></security:http><!-- 配置认证管理器 --><security:authentication-manager><security:authentication-provider><security:password-encoder hash="md5" /><security:user-service><security:user name="admin" password="21232f297a57a5a743894a0e4a801fc3"authorities="ROLE_USER" /></security:user-service></security:authentication-provider></security:authentication-manager></beans>5.新建jsp文件index.jsp好了,可以部署,启动运行了,当项目启动后访问index.jsp时会发现知道转向到登录页面,但是我们并没有创建登录的页面,会发现,这个登录页面是springsecurity自己创建的登录页面源码如下:[html]<html><head><title>Login Page</title></head><body onload='document.f.j_username.focus();'><h3>用户登录</h3><form name='f' action='<%=request.getContextPath() %>/j_spring_security_check'method='POST'><table><tr><td>用户名:</td><td><input type='text' name='j_username' value=''></td>&补充:软件开发 , Java ,上一个:jdk环境变量配置
下一个:生产者消费者模式详解及代码实现
- 更多JAVA疑问解答:
- java怎么在线读取ftp服务器上的文件内容
- 关于程序员的职业规划
- HTML和JSP矛盾吗?
- java小程序如何打包?
- java怎么split路径文件名?
- jsp+javaBean中Column 'ordersPrice' specified twice的错误
- Java TCP/IP Socket网络编程系列
- 大家来讨论一下我到底该用什么好?Swing 还是 JavaFX
- 关于Hibernate实体自身多对一的抓取问题
- 关于apache2+tomcat群集出现的问题
- spring 获取上下文问题
- SSH 导入导出excel 谁有这块的资料吗?
- Ext TreePanel 刷新问题
- springmvc 加载一个jsp页面执行多个方法 报404
- checkbox数组action怎么向页面传值