android之Listview的分组实现
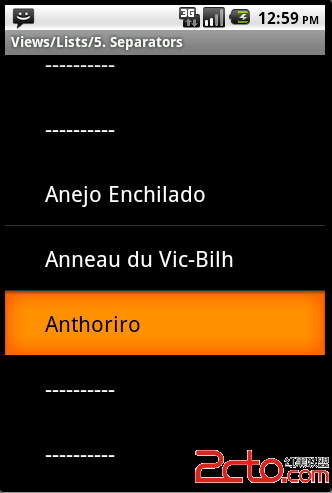
对于Listview的分组我们再熟悉不过了,因为Android自带的通讯录中的联系人信息就是使用的ListView分组,最近项目中用到了这个功能。所以趁着周末有时间,也更新下一篇这样的博客,希望对大家能够有帮助。
其实对于分组的ListView和我们平时用的ListView没有多大差别,就是需要在适配器中的getView方法中做下判断。只要理解了这个,下面就好说了,下面我们看下实现代码。
首先是main.xml布局:
[html] <?xml version="1.0" encoding="utf-8"?>
<LinearLayout xmlns:android="http://schemas.android.com/apk/res/android"
android:layout_width="fill_parent"
android:layout_height="fill_parent"
android:background="#ffffff"
android:orientation="vertical" >
<ListView
android:id="@+id/listView_list"
android:layout_width="match_parent"
android:layout_height="wrap_content" >
</ListView>
</LinearLayout>
<?xml version="1.0" encoding="utf-8"?>
<LinearLayout xmlns:android="http://schemas.android.com/apk/res/android"
android:layout_width="fill_parent"
android:layout_height="fill_parent"
android:background="#ffffff"
android:orientation="vertical" >
<ListView
android:id="@+id/listView_list"
android:layout_width="match_parent"
android:layout_height="wrap_content" >
</ListView>
</LinearLayout>
因为listview要加载两种不同的item,所以要实现两个item布局,addexam_list_item.xml:
[html] <?xml version="1.0" encoding="utf-8"?>
<LinearLayout xmlns:android="http://schemas.android.com/apk/res/android"
android:layout_width="fill_parent"
android:layout_height="wrap_content"
android:orientation="horizontal"
android:padding="5dip">
<ImageView
android:id="@+id/addexam_list_icon"
android:background="@drawable/ic_launcher"
android:layout_width="wrap_content"
android:layout_height="wrap_content"/>
<TextView
android:id="@+id/addexam_list_item_text"
android:layout_width="wrap_content"
android:layout_height="wrap_content"
android:layout_gravity="center"
android:layout_marginLeft="10dp"
android:text="测试数据"/>
</LinearLayout>
<?xml version="1.0" encoding="utf-8"?>
<LinearLayout xmlns:android="http://schemas.android.com/apk/res/android"
android:layout_width="fill_parent"
android:layout_height="wrap_content"
android:orientation="horizontal"
android:padding="5dip">
<ImageView
android:id="@+id/addexam_list_icon"
android:background="@drawable/ic_launcher"
android:layout_width="wrap_content"
android:layout_height="wrap_content"/>
<TextView
android:id="@+id/addexam_list_item_text"
android:layout_width="wrap_content"
android:layout_height="wrap_content"
android:layout_gravity="center"
android:layout_marginLeft="10dp"
android:text="测试数据"/>
</LinearLayout>
分组标签对应的布局addexam_list_item_tag.xml
[html] <?xml version="1.0" encoding="utf-8"?>
<LinearLayout xmlns:android="http://schemas.android.com/apk/res/android"
android:layout_width="fill_parent"
android:layout_height="wrap_content"
android:background="#666666"
android:paddingLeft="10dp"
android:gravity="center_vertical"
android:orientation="vertical" >
<TextView
android:id="@+id/addexam_list_item_text"
android:layout_width="wrap_content"
android:layout_height="20dip"
android:textColor="#ffffff"
android:text="金融考试"
android:gravity="center_vertical"/>
</LinearLayout>
<?xml version="1.0" encoding="utf-8"?>
<LinearLayout xmlns:android="http://schemas.android.com/apk/res/android"
android:layout_width="fill_parent"
android:layout_height="wrap_content"
android:background="#666666"
android:paddingLeft="10dp"
android:gravity="center_vertical"
android:orientation="vertical" >
<TextView
android:id="@+id/addexam_list_item_text"
android:layout_width="wrap_content"
android:layout_height="20dip"
android:textColor="#ffffff"
android:text="金融考试"
android:gravity="center_vertical"/>
</LinearLayout>
布局文件我们已经实现了,下面看下在程序中我们是怎么处理的吧!
补充:移动开发 , Android ,
