Windows Phone 实用开发技巧(17):自定义应用程序的Tile
在Windows Phone 7 (Nodo)之前的版本中,我们在应用程序列表中长按某个应用程序的时候,会弹出“Pin To Start”的选择,选中后系统会将该应用程序的快捷方式Pin到启动界面中,类似于Windows 上的桌面快捷方式。那时候呈现在启动界面的图片是应用程序中的Background.png,如果你没有改变该变片的话,Pin到Start中的图片大致如下: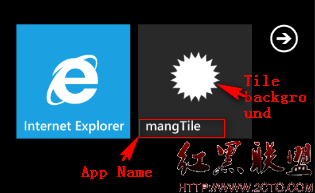
在Mango中,我们可以做的更多(在Nodo中我们仅能改变背景图片和应用程序的显示名字),在Mango中,我们可以:
1. 动态更新Pin 到桌面的背景图片
2. 创建一个Secondary的Tile,让我们的Tile 变得更加Live
3. 可以使用Back Agent动态更新Count
马宁大大给出了一篇很好的入门文章《马宁的Windows Phone 7.1初体验(三)——Tile》
下面讲讲稍微高级一点的知识
1. 在代码中合成图片
我在项目中会用到如下三张图片:
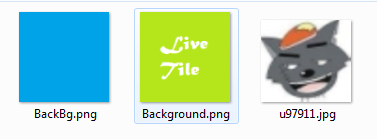
第一张BackBg.png是用于Secondary Tile的背景图片,用于和第三张图片合成,生成一张新的Secondary Tile的背景图片,中间一张图片即Tile的背景图片,最终的效果图如下图:

合成图片的思想是利用WriteableBitmap可以将UIElement保存为图片,下面是详细代码:
public static string CreateBackground()
{
Grid grid = new Grid
{
Background = new ImageBrush
{
ImageSource = new BitmapImage
{
UriSource = new Uri("/mangTile;component/Images/BackBg.png", UriKind.Relative),
CreateOptions = BitmapCreateOptions.IgnoreImageCache
}
},
Width = 173,
Height = 173
};
Image profileImg = new Image
{
Height=48,
Width=48,
Source = new BitmapImage
{
UriSource = new Uri("/mangTile;component/Images/u97911.jpg", UriKind.Relative),
CreateOptions = BitmapCreateOptions.IgnoreImageCache
},
};
grid.Children.Add(profileImg);
grid.Arrange(new Rect(0d, 0d, 173, 173));
WriteableBitmap wbmp = new WriteableBitmap(grid, null);
string tiledirectory = "Shared/ShellContent/tiles";//note :父目录必须是Shared/ShellContent
string fullPath = tiledirectory + @"/" + "LiveTile.jpg";
using (var store = IsolatedStorageFile.GetUserStoreForApplication())
{
if (!store.DirectoryExists(tiledirectory))
{
store.CreateDirectory(tiledirectory);
}
using (var stream = store.OpenFile(fullPath, System.IO.FileMode.OpenOrCreate))
{
wbmp.SaveJpeg(stream, 173, 173, 0, 100);
}
}
return "isostore:/" + fullPath;}
StandardTileData std = new StandardTileData
{
BackgroundImage=new Uri("/Background.png"),
Title = "",
BackTitle = "Secondary",
&nbs
补充:移动开发 , Windows Phone ,
