Delphi的Hint(2)
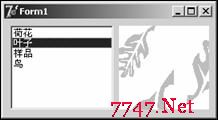
上一篇介绍了Hint的简单应用,这一篇将给出一个定制Hint窗口的例子。这个自定义Hint窗口的效果不错,以玻璃为边框,并且有阴影的效果。不过这之前,我们必须介绍一个如何定制,Hint的父类为THintWindow,在Controls单元中定义。我们看看几个虚拟方法,CreateParams设定窗口的风格,我们要覆盖掉它,使其没有边框。NCPaint画窗口的边框,我们也要覆盖它,因为我们不需要边框吗。Paint比较重要,为画Hint窗口客户区内容,当然要覆盖。不过最重要的当属ActivateHint,它会设定好窗口的大小,并显示它,我们就在这里定制一个类玻璃的窗口效果。下面给出该类的实现:
unit wdHintWnd;
inte易做图ce
uses
Windows, Classes, Controls, Graphics, Forms, SysUtils, ExtCtrls;
type
TwdHintWnd = class(THintWindow)
private
FWndBmp: TBitmap; //窗口位图
FHintBmp: TBitmap; //提示信息位图
protected
procedure CreateParams(var Params: TCreateParams); override;
procedure Paint; override;
procedure NCPaint(DC: HDC); override;
{画提示的图象}
procedure DrawHintImg(Bmp:TBitmap; AHint: string);
{取得提示窗口对应的桌面区域的图象}
procedure GetDesktopImg(Bmp: TBitmap; R: TRect);
{对桌面区域图象作处理,使其看起来像一块玻璃且带有一点阴影}
procedure EffectHandle(WndBmp, HintBmp: TBitmap);
public
constructor Create(Aowner: TComponent); override;
destructor Destroy; override;
procedure ActivateHint(Rect: TRect; const AHint: string); override;
end;
implementation
{ TwdHintWnd }
procedure TwdHintWnd.ActivateHint(Rect: TRect; const AHint: string);
var
P: TPoint;
begin
//在这里取得一个适当的尺寸显示文字
FHintBmp.Width := Rect.Right - Rect.Left;
FHintBmp.Height := Rect.Bottom - Rect.Top + 4;
DrawHintImg(FHintBmp, AHint);
FWndBmp.Width := Rect.Right - Rect.Left + 23;
FWndBmp.Height := Rect.Bottom - Rect.Top + 27;
Inc(Rect.Right, 23);
Inc(Rect.Bottom, 27);
BoundsRect := Rect;
if Left < Screen.DesktopLeft then
Left := Screen.DesktopLeft;
if Top < Screen.DesktopTop then
Top := Screen.DesktopTop;
if Left + Width > Screen.DesktopWidth then
Left := Screen.DesktopWidth - Width;
if Top + Height > Screen.DesktopHeight then
Top := Screen.DesktopHeight - Height;
GetDesktopImg(FWndBmp, BoundsRect);
EffectHandle(FWndBmp, FHintBmp);
P := ClientToScreen(Point(0, 0));
SetWindowPos(Handle, HWND_TOPMOST, P.X, P.Y, 0, 0,
SWP_SHOWWINDOW or SWP_NOACTIVATE or SWP_NOSIZE);
end;
constructor TwdHintWnd.Create(Aowner: TComponent);
begin
inherited;
FWndBmp := TBitmap.Create;
FWndBmp.PixelFormat := pf24bit;
FHintBmp := TBitmap.Create;
end;
procedure TwdHintWnd.CreateParams(var Params: TCreateParams);
begin
inherited;
//去掉窗口边框
Params.Style := Params.Style and not WS_BORDER;
end;
destructor TwdHintWnd.Destroy;
begin
FWndBmp.Free;
FHintBmp.Free;
inherited;
end;
procedure TwdHintWnd.GetDesktopImg(Bmp: TBitmap; R: TRect);
var
C: TCanvas;
begin
C:= TCanvas.Create;
try
C.Handle := GetDC(0);
Bmp.Canvas.CopyRect(Rect(0, 0, Bmp.Width, Bmp.Height), C, R);
finally
C.Free;
end;
end;
procedure TwdHintWnd.EffectHandle(WndBmp, HintBmp: TBitmap);
var
R: TRect;
i, j: Integer;
P: PByteArray;
Transt, TranstAngle: Integer;
begin
R := Rect(0, 0, WndBmp.Width - 4, WndBmp.Height - 4);
Frame3D(WndBmp.Canvas, R, clMedGray, clBtnShadow, 1);
//作窗口底下的阴影效果
Transt := 60;
for j:= WndBmp.Height - 4 to WndBmp.Height - 1 do
补充:软件开发 , Delphi ,


