Android学习笔记17:单项选择RadioButton和多项选择CheckBox的使用
在Android中,可以通过RadioButton和RadioGroup的组合来实现单项选择的效果。而多项选择则是通过CheckBox来实现的。
1.单项选择RadioButton
我们知道,一个单项选择是由两部分组成的,分别是前面的选择按钮和后面的“答案”。选择按钮可以通过RadioButton来实现,而“答案”则可以通过RadioGroup来实现。
具体的实现步骤如下:
首先,在布局文件中定义一个TextView控件,用来显示问题。
然后,再在布局文件中定义一个RadioGroup控件,用来显示答案。
最后,再在RadioGroup控件中定义四个(根据需求而定)RadioButton控件,并将“答案”分别赋给每个选项。
如下是实现一个单项选择demo的xml布局文件源代码:
单项选择xml源代码
1 <LinearLayout xmlns:android="http://schemas.android.com/apk/res/android"
2 xmlns:tools="http://schemas.android.com/tools"
3 android:orientation="vertical"
4 android:layout_width="match_parent"
5 android:layout_height="match_parent" >
6
7 <!-- 题干 -->
8 <TextView
9 android:id="@+id/textView"
10 android:layout_marginTop="10dp"
11 android:layout_width="match_parent"
12 android:layout_height="wrap_content"
13 android:text="Android底层基于以下哪一种操作系统?" >
14 </TextView>
15
16 <!-- 选项 -->
17 <RadioGroup
18 android:id="@+id/radioGroup"
19 android:layout_width="match_parent"
20 android:layout_height="wrap_content"
21 android:orientation="vertical" >
22
23 <!-- 选项1 -->
24 <RadioButton
25 android:id="@+id/radioButton1"
26 android:layout_width="match_parent"
27 android:layout_height="wrap_content"
28 android:text="Windows" >
29 </RadioButton>
30
31 <!-- 选项2 -->
32 <RadioButton
33 android:id="@+id/radioButton2"
34 android:layout_width="match_parent"
35 android:layout_height="wrap_content"
36 android:text="Linux" >
37 </RadioButton>
38
39 <!-- 选项3 -->
40 <RadioButton
41 android:id="@+id/radioButton3"
42 android:layout_width="match_parent"
43 android:layout_height="wrap_content"
44 android:text="Moc os" >
45 </RadioButton>
46
47 <!-- 选项4 -->
48 <RadioButton
49 android:id="@+id/radioButton4"
50 android:layout_width="match_parent"
51 android:layout_height="wrap_content"
52 android:text="Java" >
53 </RadioButton>
54
55 </RadioGroup>
56
57 </LinearLayout>
通过以上三个步骤,我们便可以很轻松的实现单项选择的效果了,上述demo源代码的运行效果如图1所示。
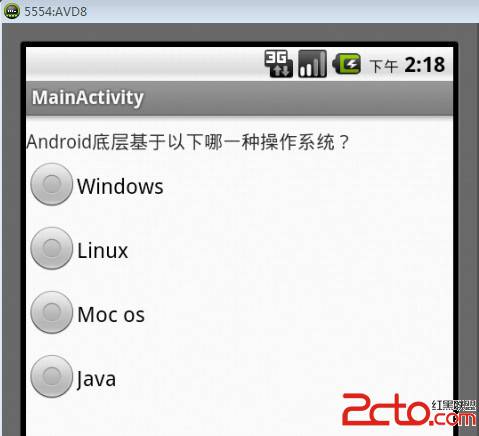
图1 单项选择界面
因为是单项选择,所以各个选项之间存在互斥性,即仅能选中其中的某一个选项。那么如何来确定用户的选择是否正确,并给出相应的提示信息呢?
要确定用户的选择是否正确,需要知道用户选择的是选项中的哪一项,这可以通过为RadioGroup设置事件易做图setOnCheckedChangeListener来实现。通过该事件易做图便可以判断出用户点击的是哪一个RadioButton了。然后,再使用Toast来显示相应的提示信息即可。
用上述方案实现单项选择demo的java源代码如下:
单项选择java源代码
1 package com.example.android_radiobutton;
2
3 import android.os.Bundle;
4 import android.view.Gravity;
5 import android.widget.RadioButton;
6 import android.widget.RadioGroup;
7 import android.widget.TextView;
8 import android.widget.Toast;
9 import android.app.Activity;
10
11 public class MainActivity extends Activity {
12
13 TextView mTextView; //TextView对象,用于显示问题
14 RadioGroup mRadioGroup; //RadioGroup对象,用于显示答案
15 RadioButton mRadioButton_1; //RadioButton对象,用于显示选项1
16 RadioButton mRadioButton_2; &
补充:移动开发 , Android ,